どうも、靖宗です。
今回はPhoenixの起動など?いわゆるHello worldという認識です。
この章はPhoenixのインストールまでが終わっている想定です。
早速進めて行きましょう。
Up and Running
なにやらPhoenixのプロジェクトを開始するにはmixからコマンドで作ってやるのが良さそうです。
プロジェクト名はhello_phoenixとしました。
PS > mix phx.new hello_phoenix
* creating hello_phoenix/config/config.exs
* creating hello_phoenix/config/dev.exs
* creating hello_phoenix/config/prod.exs
* creating hello_phoenix/config/prod.secret.exs
* creating hello_phoenix/config/test.exs
* creating hello_phoenix/lib/hello_phoenix/application.ex
* creating hello_phoenix/lib/hello_phoenix.ex
* creating hello_phoenix/lib/hello_phoenix_web/channels/user_socket.ex
* creating hello_phoenix/lib/hello_phoenix_web/views/error_helpers.ex
* creating hello_phoenix/lib/hello_phoenix_web/views/error_view.ex
* creating hello_phoenix/lib/hello_phoenix_web/endpoint.ex
* creating hello_phoenix/lib/hello_phoenix_web/router.ex
* creating hello_phoenix/lib/hello_phoenix_web.ex
* creating hello_phoenix/mix.exs
* creating hello_phoenix/README.md
* creating hello_phoenix/.formatter.exs
* creating hello_phoenix/.gitignore
* creating hello_phoenix/test/support/channel_case.ex
* creating hello_phoenix/test/support/conn_case.ex
* creating hello_phoenix/test/test_helper.exs
* creating hello_phoenix/test/hello_phoenix_web/views/error_view_test.exs
* creating hello_phoenix/lib/hello_phoenix_web/gettext.ex
* creating hello_phoenix/priv/gettext/en/LC_MESSAGES/errors.po
* creating hello_phoenix/priv/gettext/errors.pot
* creating hello_phoenix/lib/hello_phoenix/repo.ex
* creating hello_phoenix/priv/repo/migrations/.formatter.exs
* creating hello_phoenix/priv/repo/seeds.exs
* creating hello_phoenix/test/support/data_case.ex
* creating hello_phoenix/lib/hello_phoenix_web/controllers/page_controller.ex
* creating hello_phoenix/lib/hello_phoenix_web/templates/layout/app.html.eex
* creating hello_phoenix/lib/hello_phoenix_web/templates/page/index.html.eex
* creating hello_phoenix/lib/hello_phoenix_web/views/layout_view.ex
* creating hello_phoenix/lib/hello_phoenix_web/views/page_view.ex
* creating hello_phoenix/test/hello_phoenix_web/controllers/page_controller_test.exs
* creating hello_phoenix/test/hello_phoenix_web/views/layout_view_test.exs
* creating hello_phoenix/test/hello_phoenix_web/views/page_view_test.exs
* creating hello_phoenix/assets/webpack.config.js
* creating hello_phoenix/assets/.babelrc
* creating hello_phoenix/assets/css/app.css
* creating hello_phoenix/assets/css/phoenix.css
* creating hello_phoenix/assets/js/app.js
* creating hello_phoenix/assets/js/socket.js
* creating hello_phoenix/assets/package.json
* creating hello_phoenix/assets/static/robots.txt
* creating hello_phoenix/assets/static/images/phoenix.png
* creating hello_phoenix/assets/static/favicon.ico

Fetch and install dependencies? [Yn] Y
* running mix deps.get
* running cd assets && npm install && node node_modules/webpack/bin/webpack.js --mode development

We are almost there! The following steps are missing:

    $ cd hello_phoenix

Then configure your database in config/dev.exs and run:

    $ mix ecto.create

Start your Phoenix app with:

    $ mix phx.server

You can also run your app inside IEx (Interactive Elixir) as:

    $ iex -S mix phx.server
途中でFetch and install dependencies?と聞かれたのでとりあえずYにしました。
webpackとEctoに依存してるそうですが、一応--no-webpackや--no-ectoで依存関係無しのプロジェクトを作成できるそうです。
前回PostgreSQLのユーザー名とパスワードをいじってるのでその設定を書いておきます。
config/dev.exsを編集します。
# Configure your database
config :hello_phoenix, HelloPhoenix.Repo,
  username: "elixir", # デフォルトはpostgres
  password: "elixir", # デフォルトはpostgres
  database: "hello_phoenix_dev",
  hostname: "localhost",
  pool_size: 10
修正が完了したら、プロジェクトフォルダに移動してデータベースなどの作成を行います。
PS > cd hello_phoenix
PS > mix ecto.create
Compiling 13 files (.ex)
Generated hello_phoenix app
The database for HelloPhoenix.Repo has been created
Phoenixサーバーを立ち上げます。
PS > mix phx.server
[warn] Phoenix is unable to create symlinks. Phoenix' code reloader will run considerably faster if symlinks are allowed. On Windows, the lack of symlinks may even cause empty assets to be served. Luckily, you can address this issue by starting your Windows terminal at least once with "Run as Administrator" and then running your Phoenix application.
[info] Running HelloPhoenixWeb.Endpoint with cowboy 2.6.1 at http://localhost:4000

Webpack is watching the files…

...
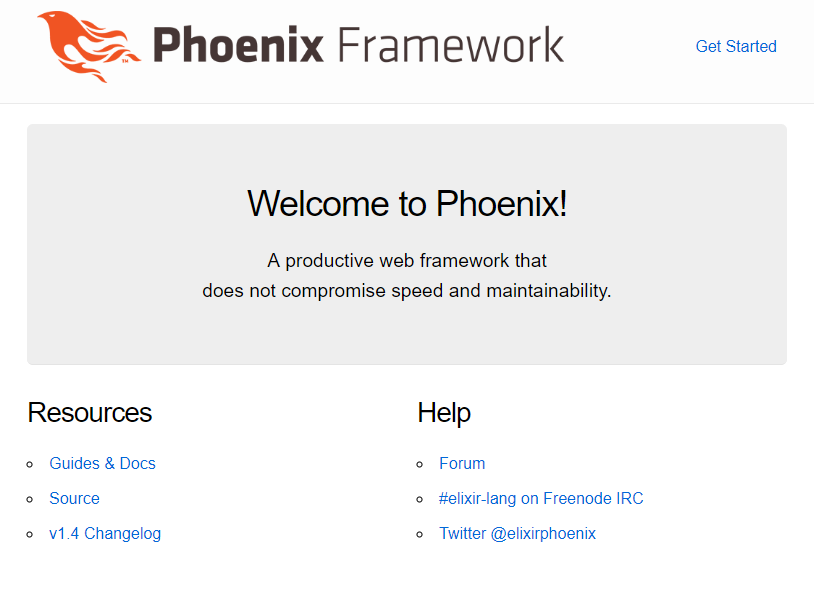
ゴチャゴチャとなんか出ますが、特に落ちてる様子が無ければhttp://localhost:4000でサーバーへアクセスできるようになっていると思います。

OSによってはhttp://127.0.0.1:4000の場合もあるそうですが、どちらもローカルホストの4000番をブラウザで表示するかんじです。
持ち歩いてるマシンがWin 10 HomeでDockerが素直に入らなかったりでちょっと時間がかかりましたが、Phoenixを利用するにあたってそこまで大きな障壁は無さそうです。